Knowing how to replace skirting boards is a useful skill for any homeowner or landlord. Skirting boards protect the base of your walls, hide gaps and give every room a finished look. Over time they get scuffed, cracked, rotten or simply out of date. New boards transform a room quickly and at a modest cost. This guide walks you through every stage, from choosing boards to the final coat of paint, and explains when a professional joiner is the better choice.
Before You Start: When to Replace Skirting Boards
Not every damaged board needs replacing. Look closely and decide whether repair or replacement makes sense. Replace your skirting boards if you notice:
- Deep cracks, splits or chunks missing from the timber
- Rot, soft patches or crumbling wood, often caused by damp
- Boards that have warped, bowed or pulled away from the wall
- Heavy layers of old paint that hide the profile and cannot be stripped
- Water damage after a leak or flood
- A style that no longer suits your room, or boards that are too low
- Damage after plumbing, rewiring or other building work
If the damage is minor, repair may be enough. If damp caused the problem, fix the source first, or new boards will rot too.
Choose the Right Skirting Boards
The right choice affects both looks and lifespan. Start with the material. MDF is smooth, affordable and easy to paint, but it swells if it gets wet, so it is not ideal for damp-prone areas. Softwood, such as pine, is strong and traditional. Hardwood offers a premium finish and suits stained or natural looks. PVC resists moisture and suits bathrooms and kitchens.
Next, pick a profile and height. Common profiles include square, bullnose, ogee and torus. Taller boards suit high ceilings and period homes, while shorter boards suit modern rooms. In older properties, matching the original profile helps keep the character of the home. Historic England offers guidance on caring for period features. Buy a little more than you need, so you can allow for mistakes and cutting waste.
Tools and Materials You Need
Gather your kit before you start. A good set of tools makes the job faster and neater. You will need:
- A tape measure, pencil and spirit level
- A flat pry bar and a hammer
- A mitre saw or mitre box with a fine-toothed hand saw
- A coping saw for internal corners
- A cable and pipe detector
- Grab adhesive and a sealant gun
- Finishing nails, or a nail gun if you have one
- Decorator’s caulk, wood filler and a filling knife
- Sandpaper, primer and paint, plus a brush
- Safety glasses, gloves and a dust mask
Having everything to hand stops you stopping halfway through a job.
Safety Checks First
Safety comes before speed. Skirting boards often hide electrical cables, pipes and fixings. Use a detector to check the wall before you nail or drill. Turn off power to nearby circuits if you are unsure. Take care around radiator pipes, which often run close to the floor.
Older homes need extra caution. Some old plasters, textured coatings and building materials may contain asbestos. Do not sand, drill or break up materials you suspect contain it. The Health and Safety Executive asbestos guidance explains how to spot the risk and what to do next. Wear a dust mask and eye protection throughout.
How to Replace Skirting Boards: Step by Step
Follow these stages in order. Take your time, because accuracy at each step gives a neat final result.
Measure and Plan
Measure each wall along the floor, and note where corners, doors and radiators sit. Add a little extra to each length for cutting. Plan which boards will run the full length of each wall, and use the longest boards on the longest, most visible walls to reduce joins. Mark the position of cables and pipes you found with the detector.
Remove the Old Boards
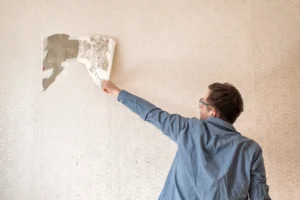
Score the paint line along the top of the old board with a sharp knife, so the wall paint does not tear. Place a thin piece of wood against the wall to protect it, then use the pry bar to ease the board away gently. Work along the length, loosening it a little at a time to avoid cracking the plaster. Remove any nails and clean the wall. Pulling the board off carefully saves you from wall repairs later.
Prepare the Wall
Fill holes and cracks, and scrape away loose paint or plaster. Check that the wall surface is flat and sound. Mark the positions of studs or solid fixing points if you plan to nail, or make sure the wall is clean and dry for adhesive. A tidy wall helps new boards sit tightly.
Cut the Boards
Corners need accurate cuts. For external corners, such as a chimney breast, cut matching mitres so the two pieces meet neatly. For internal corners, scribe or cope one board to fit the profile of the other. This gives a tighter joint than a simple mitre, because walls are rarely perfectly square. Test each cut before you fix the board, and trim until it fits. Cut slowly, because small errors show in the finished joint.
Fix the New Boards
Start with the longest wall. Apply grab adhesive to the back of the board in a line along its length, then press it firmly against the wall. Add finishing nails into studs or solid fixings to hold it while the adhesive sets. Keep the top edge level. Use packers if the floor or wall is uneven. Work around the room, checking each joint as you go.
Fill, Caulk and Sand
Fill nail holes with wood filler, and let it dry. Run a thin bead of decorator’s caulk along the top edge where the board meets the wall, and smooth it with a damp finger. Fill joints in corners if needed. Sand the filler smooth, and wipe away the dust. This step hides gaps and gives crisp, professional lines.
Prime and Paint
Prime the boards, especially bare MDF or timber. Then apply two coats of paint, with light sanding between coats if needed. Use masking tape against floors and walls for sharp edges. Satin or gloss paints are popular because they wipe clean easily. Good painting and decorating turns new boards into a polished feature.
How to Replace Architrave
Architrave is the moulding around door frames, and it often matches the skirting. Many people ask how to replace architrave at the same time as the skirting. The process is similar. Score the paint, and gently prise the old architrave away. Measure the door frame, and cut the new top piece with matching mitres at the corners. Cut the side pieces to length, and test the fit. Fix with adhesive and finishing nails, fill the holes, caulk the gaps and paint. Leave a small, even gap between the architrave and the inner edge of the frame. Matching skirting and architrave gives a cohesive finish.
Skirting Board Repair: Fix Before You Replace
Sometimes repair is cheaper and quicker. For dents and small chips, fill the damage with wood filler, sand it smooth and repaint. For loose boards, refix them with adhesive and nails. For small areas of rot, cut out the damaged section and splice in a new piece, then fill and paint the joint. A good skirting board repair can keep original period boards, which are often hard to match. If rot is widespread or the board is soft and crumbling, replacement is the better option. Always cure the cause of damp before you repair or replace anything.
Common Skirting Board Mistakes
A few errors cause most problems. Fixing boards without checking for cables and pipes is dangerous. Using simple mitres on internal corners often leaves gaps as walls are not square. Skipping caulk leaves visible gaps along the wall. Using MDF in damp rooms leads to swelling. Painting before the filler is dry shows every patch. Rushing leads to uneven joints and wasted boards. Measure twice, cut once and test each joint before you fix it.
When to Hire a Skirting Board Fitter
Many people can fit skirting boards, but some jobs suit a professional. Consider a skirting board fitter if:
- Walls or floors are very uneven and need careful scribing
- You are fitting tall or heavy boards, or complex period profiles
- You need to match existing boards in a period home
- Damp or rot may be present behind the boards
- There are many corners, alcoves, bay windows or stairs
- Cables, pipes or radiators sit close to the boards
- You want a flawless finish with little time to spend
A professional skirting board fitter has the tools and experience to cut tight joints and fit boards quickly. Ask for a written quote that lists the boards, fixing and finish. Trade bodies such as the British Woodworking Federation promote good standards in joinery. Check insurance and ask to see photos of recent work.
Why Choose Housing Solutions For You?
Housing Solutions For You offers skilled carpentry and joinery for skirting boards, architraves, doors and bespoke woodwork. Our team can measure, supply and fit boards neatly, and repair damaged sections where that makes sense. After fitting, our painting and decorating team finishes the boards, and our professional cleaning services leave the room spotless. If damp or leaks caused the damage, our plumbing and installation team can fix the source. Landlords and homeowners get clear quotes, honest advice and one team for every job.
Final Thoughts
New skirting boards make a room look sharper and protect your walls. Check for hidden hazards, choose the right boards, cut tight corners and finish neatly with filler, caulk and paint. For uneven walls, period profiles or large jobs, call a professional. Housing Solutions For You is ready to fit, repair and finish your skirting boards with careful workmanship and clear communication. Plan well, and your finished rooms will look great for years.
“Call us today at +44 7984 122 111 and let’s chat, or visit us at London, UK.”